Posted by Brent VerWeyst, Product Manager, Google Enterprise Search
Your company has a wealth of collective knowledge and data, but how quickly can employees or customers find the right information? Google Search Appliance (GSA) gives businesses a simple way to search all their content, no matter where it lives or what format it’s in. Today we’re adding new capabilities to GSA with version 7.2, making it even easier to find documents, organize your data and let your team focus on what really matters: getting things done.
Entity management gets easier GSA 7.0 introduced entity recognition, which helps businesses categorize unstructured content by extracting entities—attributes like date, author and product type—from documents. With GSA 7.2, you get a chance to test and tweak your entities before indexing begins. This helps ensure that the entities you choose and apply will work best for your organization’s needs.
Helping to make search more universal Companies rely on GSA to make all their files discoverable from a single search box, no matter where they live. It does this with the help of components called connectors, which link GSA to various data sources and index their contents. In GSA 7.2, we’ve made the connector framework more scalable and flexible. Customers and partners can develop and improve custom connectors more easily, helping GSA become a truly universal information hub.
More search, less typing Relevant results shouldn’t rely on exact queries—especially when you’re dealing with long product names or technical data. Say you’re searching for part number 3728. With GSA 7.2, instead of struggling to remember the exact part number, you can type in “part number 37” plus a wildcard character such as an * to execute the query. With wildcard search, you don’t have to memorize complicated terms to find what you need.
In addition to these features, GSA 7.2 also introduces a redesigned admin console, improved language support and advanced sorting. To upgrade your GSA software, login to the Google Support Portal and download the release beginning at 9:00 am PT today.
To find out more about Google Search Appliance, click here.
Blackberry supplied a free Desktop Manager that made syncing Outlook with the handset via a USB cable very, very easy. Contacts, calendar, notes and tasks on my laptop were also on my Blackberry.
Times move, the iPhone and Androids are now the in-devices. Everyones using it, businesses included. Why then is it so difficult finding something to sync an Android phone with Outlook. I was even willing to pay!!
Fortunately, FJ Software Development came to the rescue with MyPhoneExplorer. Its free too (but Ill definitely be making a PayPal donation!)
To sync via a USB-Cable:
1. Download MyPhoneExplorer [Here] and install 2. Download an ADB Driver [Here] 3. On the mobile, enable USB-Debugging Settings -> Application -> Development Settings -> Apps -> Development Settings -> Developer options: 4. Connect mobile and install an ADB Driver 5. Start the MyPhoneExplorer on your PC 6. Setup the sync options File -> Settings 7. In the Connection-Tab under Phone Typ choose Phone with Google Android-OS and in Connect via... choose the option Autodetect. 8. Connect with the "F1"-button or via "File->Connect" 9. Now your Device should be connected to the MyPhoneExplorer. Select what you want to sync.
I dont buy into the iPad as a laptop replacement—not quite. But it is fantastic at tapping into your computers to access video and audio, documents, and even your full desktop, remotely. Heres how.
The iPad is first a foremost a device for consuming media, and where is most of your media if not on your desktop or laptop? All your videos, both self-created and downloaded; your music collection, which is so much larger than your iPads flash storage can dream of accomodating; your store of documents, which contain so much information about you, your work and your interests. On your iPad, this stuff is too often there, not here—but it doesnt have to be.
You can easily access all of these things from your iPad with a set of simple-to-use apps, and where those dont work, you can actually control your computer—mouse and all—from your iPad. Heres what you need:
Audio and Video
Audio and video streaming on the iPad is, for the time being, the domain of two apps: Air Video and StreamToMe. Theyre extremely similar, sharing their $3 price, iPhone compatibility, and an underlying video conversion library, but a few key differences will determine which one you need to download. So!
If you...
• Have a Windows PC • Dont need to stream audio • Tend to store your content in h.264/mp4 files
Go with Air Video. Its a wonderful app, which lets you stream video—even in formats not natively supported by the iPad—both locally and remotely (with simple port forwarding), and which has both Mac and PC server software. Its flexible as well, giving you precise control over streamed video quality, and options for either transcoding video live, or pre-converting it before streaming.
SEXPAND
h.264 playback, even in HD, seemed cleaner and bit smoother than in StreamToMe, so if youve ripped or downloaded most of your content in that format, Air Video is a slightly better choice. It transcodes your downloaded .avi file beautifully, too.
(Note there currently isnt a good DLNA streaming app, though once its bugs are worked out, PlugPlayer shows promise. For the time being, Air Video is the only way to stream and transcode your video library stored on a Windows PC)
If you...
• Have a Mac • Want to stream audio files as well
Then you should download StreamToMe. It too can transcode video in real time, so you dont need to worry about converting your home video files or P2P downloads. Its main advantage over Air Video is that it can stream audio. Itd be nice if the app had an iTunes-style artist view, but if your iTunes music folder is organized by artist name and album title (if you havent told it to do something else, iTunes will have taken care of this for you), navigating through and playing songs is pretty straightforward.
SEXPAND
The setup routines for both apps are nearly identical. Each requires a server app to be run on your computer, which needs to be pointed to your video library, and each will automatically recognize your computer over a local network. For remote streaming, each app provides guidance for which ports to forward on your router. (For instructions for your specific router, check here.) This means you can stream your home video from anywhere—work, a hotel room, whatever—over Wi-Fi.
Documents
Document sharing on the iPad isnt particularly easy, relying on the awkward iTunes file sharing system, which only lets you access documents in the app theyve been flagged for. To browse apps in a more useful way, youll need get an app called GoodReader. Its $1.
SEXPAND
GoodReader is an app that enables you to connect to all kinds of file servers, be they cloud-based (Google Docs, Dropbox, or MobileMe) or local (an FTP or WebDAV server). Once connected, GoodReader lists files that can be read on a given server, which are left up to the iPads inbuilt viewers to display. This means that Word, Excel and PowerPoint documents, as well as a range of other text files, images, and even audio files, can be opened in the app.
SEXPAND
One of the most compelling features of GoodReader is that it can turn your iPad into a local file server, which you can mount and connect to from any Mac or PC. This feature lets you drag and drop your documents to the iPad, as if it were a NAS device. (GoodReader also shows up in the iTunes USB file transfer dialog, but Wi-Fi drag-and-drop transfer is much faster and easier, once its set up.) Instructions for server setup are available here.
Additionally, using the apps "Manage Files" pane, you can sort, administer and email your documents as well. Its basically like having a disk for all kinds of media, on your iPad, along with a file browser. Ha!
Controlling Your Desktop
If you want full access to your computer, video, audio and document file servers wont be enough. What about your applications? Your iPad-incompatible files? Your entire desktop? To get that kind of control, you need to use VNC.
From our previous How To guide on the subject:
VNC (virtual network computing) is one of those tricks that never gets old, and having it set up can often save your ass-whether you left some info on your home computer that you need at work, want to check on your massive BitTorrent queue to schedule the evenings entertainments, or help your poor parents use clip art in Microsoft Word, having remote access can be handy dandy.
For full setup instructions for Windows and OS X, follow our guide here.
Once youve done that, youll need an iPad VNC client. The iPad App Store already has a handful of VNC apps available for download. The ones Id go with are Mocha VNC Lite (a free, limited-capability app), and if you find you like the VNC concept, the $12 Desktop Connect.
SEXPAND
Its strange, controlling a mouse-based computer from a touchscreen device, but theres one option Ive found makes life a lot easier: In Desktop Connect, turn Touchscreen Mode off. This options has you control the mouse as if the whole touchscreen is a trackpad, rather than having to guide the mouse directly with your finger. After a few minutes, youll be clicking around Windows or OS X without thinking about it.
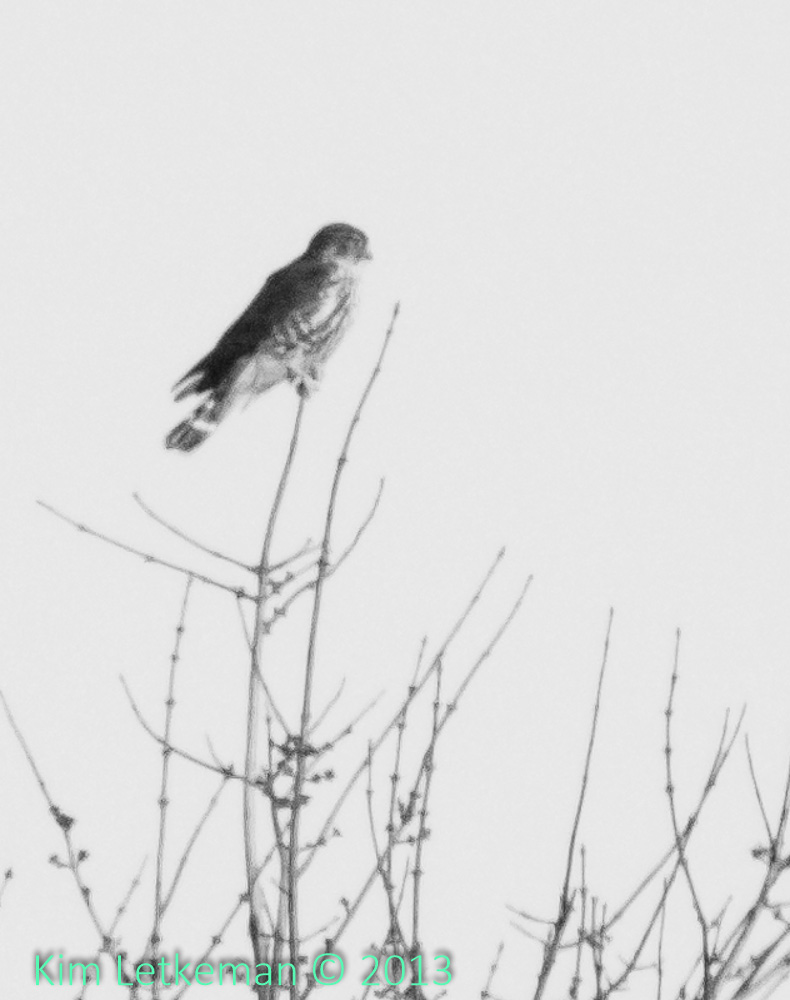
So I hacked the RAW to see if the hawk a mile away in a tree image from part 6 could be improved upon. Hacking the RAW is trivial with a tool like ExifTool GUI … you click on the image, then click on “Workspace” and finally in the field at the bottom of the right hand pane, you change the name of the camera. You end up with this:
Lightroom is perfectly fooled by this one change, so the RAW file is suddenly importable. And import it I did.
But I noticed right away that the colors were wonky. The hack worked last year on the F770EXR because the camera whose name I used – the F550EXR – has basically the same sensor, despite the marketing hyperbole about a new and improved sensor. But the F800EXR sensor is of that same generation while the F900EXR and HS50EXR have the new sensor with phase detect pixels on them. And it appears that the color matrix is really different. The old demosaic algorithm has no ability to deal with this matrix. Case in point:
Note also the wonky right edge, as the HS50 lens has distortions that could not possibly match that in the F800EXR. So all in all an EPIC FAIL!
Help me Obiwan Adobe, you’re my only hope
Yes, that nerdy thought just came to me out of the blue.
Of course, a black and white image based on this set of colors is going to be equally weird. Almost infrared-like, it turns out.
Still, it was fun to try.
Adobe said on their forums today that the F900EXR and HS50EXR support was coming out really soon, so I am holding out hope that I can get Lightroom 4.5 beta before I have to give the camera back. We will revisit this image should that come to pass :-)
One of the basic requirements for most wedding photography assignment in KL, mostly relevant for Chinese Wedding ceremonies on actual day coverage, would be creating a photo-slideshow comprising images taken from the morning session of the wedding ceremony. The said photo-slideshow presentation is to be produced just in time for presentation to the guests during the reception dinner, which usually happens on the evening of the same day.
Many local wedding photographers would find this photo-slideshow to be a huge challenge, worrying about whether they have enough time to complete the photo-slideshow presentation before the dinner. I faced the similar problem as well on my latest photography assignment last weekend. The shooting assignment started at ungodly 5.30am in the morning, and the whole morning was killed off by the preparations, brother-sister war, the traditional tea ceremony at the bride and groom’s place, etc. As the final itinerary of the day ended, it was already about 2.30pm, and I have to depart to the dinner location at 5pm. Arriving home at nearly 3pm, that left me about less than two hours to create and complete the previous mentioned photo-slideshow presentation. This was not looking very promising, because on usual other assignment I had the entire afternoon (at least 3-4 hours) to complete the slideshow.
Nonetheless, I cranked up my speed and I did what I had to do.
Same Day Edit Photo-Slideshow(for reception dinner presentation)
ZHEN BING & HUEI YIEN
For optimum viewing please watch the Youtube Video in full 720p resolution.
Here is the list of things I did which helped speed up my workflow:
1) Shooting RAW + JPEG
I shot in both RAW and JPEG, so that I only have to deal with JPEG files for the slideshow, minus the time needed to convert and develop the RAW files into JPEG which can be dreadfully resource demanding even on most powerful computers.
2) Straight Out of Camera
Knowing I was working on very tight time-frame, consciously I was shooting with strong consideration that the photos I will use for the same day slideshow presentation has to be usable straight out of camera, because any time used for post-processing would be time wasted. No, I did not even do any cropping to the images, all the images were presented untouched, save for some exceptions in point no. 3 as follows.
3) Applying Art Filters
Well, you have to admit, Olympus Art Filters come in very handy in such tight situations. One click to apply instant post processing to create some dramatic effects is a real life saver. I applied Pinhole, Grainy Film and Gentle Sepia to some of the photos, to create variety and more “unexpected” anticipation when going through all the photos. I also converted some images to black and white, which was also done in a single click.
4) Using AutoMovie on Windows Movie Maker
I did not have any fancy video editing softwares, I relied on my old Windows Vista version (I know I know, everyone is using Windows 7 already) of Windows Movie Maker, which was really efficient and fast in creating the photo-slideshow. After selecting about 72 photographs from the morning session, to be fitted in one song’s length of about 3 minutes plus, I dragged and dropped the photographs into the Windows Movie Maker and run the AutoMovie. Everything was automated and I loved such quick turnaround, and I only had to do a little fine tuning there and here, added the title page and final cover. This saved me heaps and heaps of time.
5) Resize the photographs
One thing I did before throwing the selected images into the Windows Movie Maker’s magical Automovie was resizing the images from the original glorious 12MP files (if you use higher resolution cameras, using full size images would choke your computer). I batched resized my images to 1600px max width or height (depending on orientation), and I applied 85% compression ratio to the images, which would still look pretty darn good on any large display. I have reduced a single file size from average 3 to 4Mb full JPEG size to only 300-500kb, which seriously saved a lot of computer processing power, thus saving even more time. Every tick is precious here. We cannot afford to lose more time. The computer loves smaller sized image files and would process the slideshow hell lot faster.
6) Making backup
The output was created in the form on DVD-playable video content, which would in turn be burned into a physical DVD disc. I would usually create a full HD soft copy which is playable by any standard PC Laptop computer, but I was running out of time, hence I only managed to create two DVDs, one for back-up, just in case.
I started transferring the files from the memory card to my computer at 3.00pm, and the whole process as described earlier completed at 4.30pm, and as I was burning the photo-slideshow into the DVD, I took a quick shower, made a peanut butter and jam sandwich, and made myself beautiful for the reception dinner. I arrived at the dinner location at about 5.40pm, did some trial runs on the dinner venue’s DVD player, and thank goodness there was no hiccup and everything ran smoothly.
It was a very huge challenge, and time was never enough, but hey, you have to do what you have to do. I guess it takes a lot out of the photographer, to be able to shoot usable images straight out of the camera, to be able to follow through a strict and efficient workflow, working against time.
No, the photographs were not perfect. A lot of the images would have been better if I cropped it there and here, added saturation, boosted the contrast, and the list goes on. The worst part was photographs taken during the game session, where the Bride party tortured the Groom party. The whole game session happened right under a huge red colored canopy, a nightmare faced by wedding photographers for Chinese weddings. It was called the red cast of death, where the images taken in such situation cannot be salvaged in any possible means. The annoying red cast was everywhere, and the camera’s white balance control went all wonky.
Most people would think that photography is easy, all you have to think about is just finding the right composition angles, and the right camera settings, establishing your own creativity and individual shooting style. A full on shooting process goes a lot further and deeper beyond that. It encompasses communication between the photographer and the client, the preparation works before shooting, and even during shooting day itself, there are many other elements that must be taken into account that did not even involve shooting at all, such as the photo-slideshow I have mentioned. All these things require skills a lot more than just knowing how to handle the camera, yet at the same time, you need to tie back everything in one huge, effective and fast workflow for the entire assignment duration (before, during and after shooting).
So guys, do let me think what you think of the Photo-Slideshow that I managed to do within one and a half hour. There are plenty of rooms for improvements, and I know this is no where near professional level (I never said I was a pro), but hey, we all have to start somewhere. I learn and I improve along the way, every step I take.